TL;DR: Nano Banana 2 (Gemini 3.1 Flash Image) is Google's fast, cheaper image model and the default in the Gemini app; Nano Banana Pro (Gemini 3 Pro Image) is the slower, pricier "studio-quality" model. For most product and UI assets, draft with Nano Banana 2 and save Pro for the final hero shot. Either way, an image is not a screen: bring the assets into a design tool like the UXMagic AI UI generator, which can also generate and edit images in place. For the wider field, see our guide to the best AI image generators.
If you build products, you probably reach for an image model for the same handful of jobs: a landing page hero, a few feature illustrations, a device mockup for the app store page, maybe an onboarding illustration or an empty-state graphic. Google now offers three "Nano Banana" models that can do all of that, and the naming makes it genuinely unclear which one to pick.
This guide compares Nano Banana Pro and Nano Banana 2 using only what Google publishes: its launch posts, model pages and API pricing. We have not run a benchmark, and we will not invent scores. What we can do is translate Google's specs and prices into practical choices for a product team, show where each model fits in a UI workflow, and explain where an image model stops being the right tool.
Quick answer
| If you need... | Use | Why |
|---|---|---|
| Fast drafts, many variations | Nano Banana 2 | Flash speed, about half the per-image price of Pro at 1K |
| A final, polished hero image | Nano Banana Pro | Google's highest-fidelity image model |
| Tall or ultra-wide banners | Nano Banana 2 | Adds 1:4, 4:1, 1:8 and 8:1 aspect ratios |
| Small thumbnails at scale | Nano Banana 2 (or 2 Lite) | 512px tier, cheapest per image |
| Complex scene, many constraints | Nano Banana Pro | Positioned for precision and control |
| A real, editable UI screen | Neither | Use a UI design tool, then place the images |
The last row matters more than it looks. We come back to it below.
What "Nano Banana" actually is
"Nano Banana" is Google's nickname for the image generation models in the Gemini family. The name started as a codename and stuck. Here is the lineup as of September 2026, using the official model names from Google's Gemini API pricing page:
| Nickname | Official model | API model ID | Released | Status |
|---|---|---|---|---|
| Nano Banana | Gemini 2.5 Flash Image | gemini-2.5-flash-image | August 2025 | Deprecated, API shutdown October 2, 2026 |
| Nano Banana Pro | Gemini 3 Pro Image | gemini-3-pro-image | November 20, 2025 | Available |
| Nano Banana 2 | Gemini 3.1 Flash Image | gemini-3.1-flash-image | February 26, 2026 | Available, Gemini app default |
| Nano Banana 2 Lite | Gemini 3.1 Flash Lite Image | gemini-3.1-flash-lite-image | Mid-2026 | Available |
So despite the numbering, Nano Banana 2 is the newer model and Nano Banana Pro is the older, larger one. "2" is the second generation of the fast Flash line; "Pro" is built on the bigger Gemini 3 Pro model. Google's model page on DeepMind sums up the split: Pro is for "studio-quality levels of precision and control", Nano Banana 2 is "Pro-level image generation and editing, at Flash speed", and 2 Lite is the fastest and most efficient.
One warning before you search: several apps and websites use the "Nano Banana" name without being Google products. The real models are in the Gemini app, Google AI Studio, the Gemini API and Vertex AI.
If you are also choosing a text model for design work, our sibling guide to the best AI model for UI design covers Gemini, Claude and GPT for layouts and front-end code.
Nano Banana Pro vs Nano Banana 2: the differences that matter
Both models share the core Gemini image features: you can generate from text, edit an image by describing the change, combine several reference images, render legible text, and ground the output in Google Search for real-world subjects. The differences are in speed, ceiling, formats and price.
| Nano Banana Pro | Nano Banana 2 | |
|---|---|---|
| Official name | Gemini 3 Pro Image | Gemini 3.1 Flash Image |
| Google's positioning | Studio quality, precision and control | Pro-level quality at Flash speed |
| Output sizes | 1K, 2K, 4K | 512px, 1K, 2K, 4K |
| Extra aspect ratios | Standard set | Adds 1:4, 4:1, 1:8, 8:1 |
| Search grounding | Google web search | Web search plus Google Image Search |
| Thinking control | Built-in reasoning | Configurable thinking level |
| Consistency (per Google) | Up to 14 reference images, up to 5 people | Up to 5 characters and 14 objects |
| API price, 1K image | About $0.134 | About $0.067 |
| API price, 4K image | About $0.24 | About $0.151 |
| Default in Gemini app | No (paid plans can switch to it) | Yes |
Speed and iteration
Nano Banana 2 exists to be quick. Google's Nano Banana 2 announcement frames it as bringing Flash speed to image generation so you can iterate rapidly, and it replaced Pro as the default model across the Gemini app. For design work, speed changes how you use the tool: you can afford to generate six directions for a hero, pick one, then refine it, instead of carefully writing one prompt and hoping.
Quality ceiling and control
Pro is the model Google points to when fidelity matters most. Its launch post highlights studio-style controls such as lighting, camera angle, colour grading and depth of field, plus 2K and 4K output. In practice that makes Pro the better bet for the one image that carries a page: the hero photo, the product shot on the pricing page, the launch banner. Google's own positioning is the most reliable guide here; public comparisons disagree, and results vary a lot by prompt.
Formats
Nano Banana 2 adds two things UI work benefits from. The 512px tier is cheap and fast for thumbnails, avatars and card images. The extreme aspect ratios (1:4, 4:1, 1:8, 8:1) suit tall mobile banners, ultra-wide website headers and email strips, which otherwise need cropping from a standard frame.
Text in images
Both models are strong at rendering legible text, and both can translate or localise text inside an image. That is useful for marketing banners, social cards and infographics. It is a trap for UI, where text should be live, editable and accessible. More on that below.
Pricing and access
Neither model has a free tier on the Gemini API; both are paid per token, which Google converts to a per-image figure. These are the standard (not batch) prices from Google's pricing page as of September 2026:
| Output size | Nano Banana Pro | Nano Banana 2 | Nano Banana 2 Lite |
|---|---|---|---|
| 512px | Not offered | $0.045 | Not offered |
| 1K | $0.134 | $0.067 | $0.0336 |
| 2K | $0.134 | $0.101 | Not offered |
| 4K | $0.24 | $0.151 | Not offered |
| Batch mode | About half | About half | About half |
A few details that change the maths:
- Pro charges the same for 1K and 2K. If you use Pro at all, 2K costs nothing extra.
- The gap is widest at small sizes. At 1K, Pro costs about twice as much as Nano Banana 2; at 4K the gap narrows to about 1.6 times.
- Grounding is billed separately. Google includes 5,000 search requests a month, shared across Gemini 3.x models, then charges $14 per 1,000.
- Batch halves the price if you can wait, which suits bulk jobs like generating a library of illustration variants overnight.
Where you can use each model:
- Gemini app: Nano Banana 2 is the default. Google says Google AI Pro and Ultra subscribers can regenerate an image with Nano Banana Pro from the three-dot menu.
- Google AI Studio and the Gemini API: both models, plus 2 Lite, with model, aspect ratio and resolution settings. The API needs a paid key.
- Vertex AI: both reached general availability in May 2026 for enterprise use.
- Other Google products: Nano Banana 2 also runs in Search (AI Mode and Lens), Flow and Google Ads; Pro rolled out to Slides, Vids and NotebookLM for Workspace customers.
Every image from both models carries Google's invisible SynthID watermark, and Google is adding C2PA Content Credentials. That is worth knowing if your brand has a policy on disclosing AI-generated imagery.
Which model for which UI asset
Here is how we would split the work for a typical product launch. None of this is a benchmark; it is the choice Google's specs and prices point to for each job.
Landing page hero images
Draft with Nano Banana 2, finish with Pro. The hero is the image people judge the product by, so it deserves the higher ceiling, but you will throw away most early directions, and paying Pro prices for those is waste. Ask for the aspect ratio you will actually use (16:9 or 21:9 for desktop, a tall ratio for mobile) and leave clear space where the headline will sit. Our breakdown of SaaS landing page design covers what the hero has to do beyond looking good, and landing page design examples that convert shows the patterns in context.
Feature illustrations and spot art
Nano Banana 2. A features section needs three to six images that look like a set. Generate the first one, then pass it back as a style reference for the others. Keep the style description identical across prompts ("flat vector illustration, two-tone teal and off-white, soft shadows, no text") and change only the subject.
Product and device mockups
Either, depending on the stakes. For internal decks and early pitches, Nano Banana 2 is plenty. For an app store listing or a pricing page shot, Pro's lighting and camera controls earn their price. If what you need is a mockup of the interface itself rather than a photo of a device, an AI mockup generator that produces real screens is a better starting point; our explainer on what a mockup is draws the line between the two.
Banners, social cards and infographics with text
Both handle text well. Use Nano Banana 2 for volume (a campaign in five sizes, localised into three languages) and Pro when a single asset has dense text or a complicated layout. Always proofread every word: a legible typo is still a typo.
Thumbnails, avatars and placeholder imagery
Nano Banana 2 at 512px, or 2 Lite at 1K if you need the lowest price. These images are small on screen, so the extra fidelity of Pro is invisible.
Consistent characters across onboarding
Both support multiple reference images and character consistency, per Google. Start with one well-defined character sheet, save it, and reference it in every prompt. Expect to regenerate a few frames; consistency across a series is still the hardest thing to get right with any image model.
Prompt tips for UI assets
The same principles apply to both models, and they overlap with good UI prompting generally, which we cover in prompting for UI that ships.
- Describe the shot, not just the subject. Subject, setting, composition, lighting and mood. "A laptop" gives you a stock photo. "A laptop on a walnut desk, three-quarter angle, morning window light from the left, shallow depth of field, calm and premium" gives you a hero.
- State the aspect ratio and the empty space. "16:9, subject on the right third, left half clean for a headline" saves a round of cropping.
- Reuse a style block. Write your visual style once (palette, rendering style, lighting, what to avoid) and paste it into every prompt for the project.
- Edit, don't regenerate. Both models edit conversationally. "Change the mug to matte black, keep everything else" is faster and more consistent than a fresh generation.
- Keep UI text out of images. Ask for "no text, no logos, no interface elements" unless the image is a banner. Put the words in the design, where they stay editable.
- Name the brand colours in plain terms and hex. "Deep teal (#0F766E) accents" is more reliable than "our brand colours".
A starter prompt for a hero image:
Photograph, 16:9. A product designer's desk seen from a three-quarter angle:
a laptop showing an abstract, blurred dashboard, a notebook with sketches,
a ceramic mug. Morning window light from the left, shallow depth of field.
Palette: warm off-white, deep teal (#0F766E) accents, natural wood.
Composition: subject in the right third, left half clean and softly lit
for a headline. No text, no logos, no readable UI.
For a matching feature illustration, keep the palette and swap the rest:
Flat vector illustration, 1:1. A single document turning into three
connected screens, drawn with simple rounded shapes.
Palette: warm off-white background, deep teal (#0F766E) and soft coral
accents, subtle shadows. Style must match the attached reference image.
No text, no logos.
Put your Nano Banana images into real screens
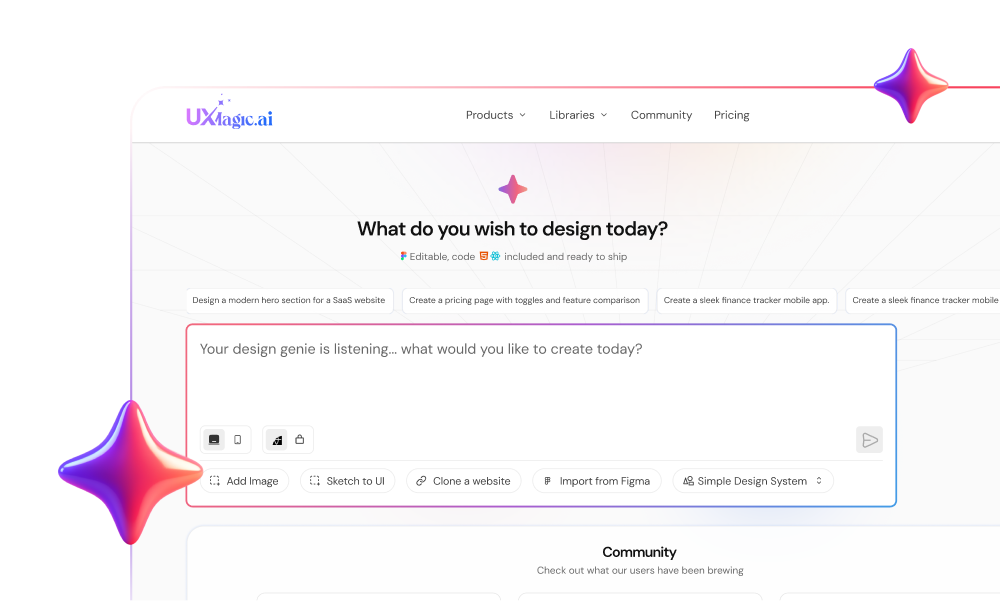
Upload your hero and illustrations, describe the page, and UXMagic designs editable screens around them in one theme.
Where image models stop and UI tools start
Both Nano Banana models will happily draw you a "SaaS dashboard" or a "mobile banking app". The result looks convincing in a slide and is close to useless in production. It is a flat picture: you cannot select a button, change a label, fix the spacing, check the contrast or hand it to a developer. Text inside the image is invisible to screen readers and search engines, which is why our accessibility heuristics checklist treats text-as-image as a failure for anything functional.
Consistency is the other problem. A picture of screen one and a picture of screen two will not share exact spacing, colours or components, because there is no underlying design system, only pixels. We cover why that matters in can AI follow design tokens?, and the same gap shows up whenever teams try to use ChatGPT for UI/UX design end to end.
The workflow that works splits the job:
- Image model for photographs, illustrations and textures.
- UI design tool for the screens themselves: layout, components, live text, theme.
- Place the images into the screens and iterate on both.
Google's own UI tool, Stitch, follows the same logic; our Google Stitch review and the list of Google Stitch alternatives cover it. Figma's route is Figma Make, which we walk through in our Figma Make tutorial. The step-by-step version of the whole process is in how to design UI with AI.
Using images inside UXMagic
UXMagic is our product, so here is exactly what it does with images, based on our images in your designs help article. We do not name the image model behind it; what matters for your workflow is what you can do with it.
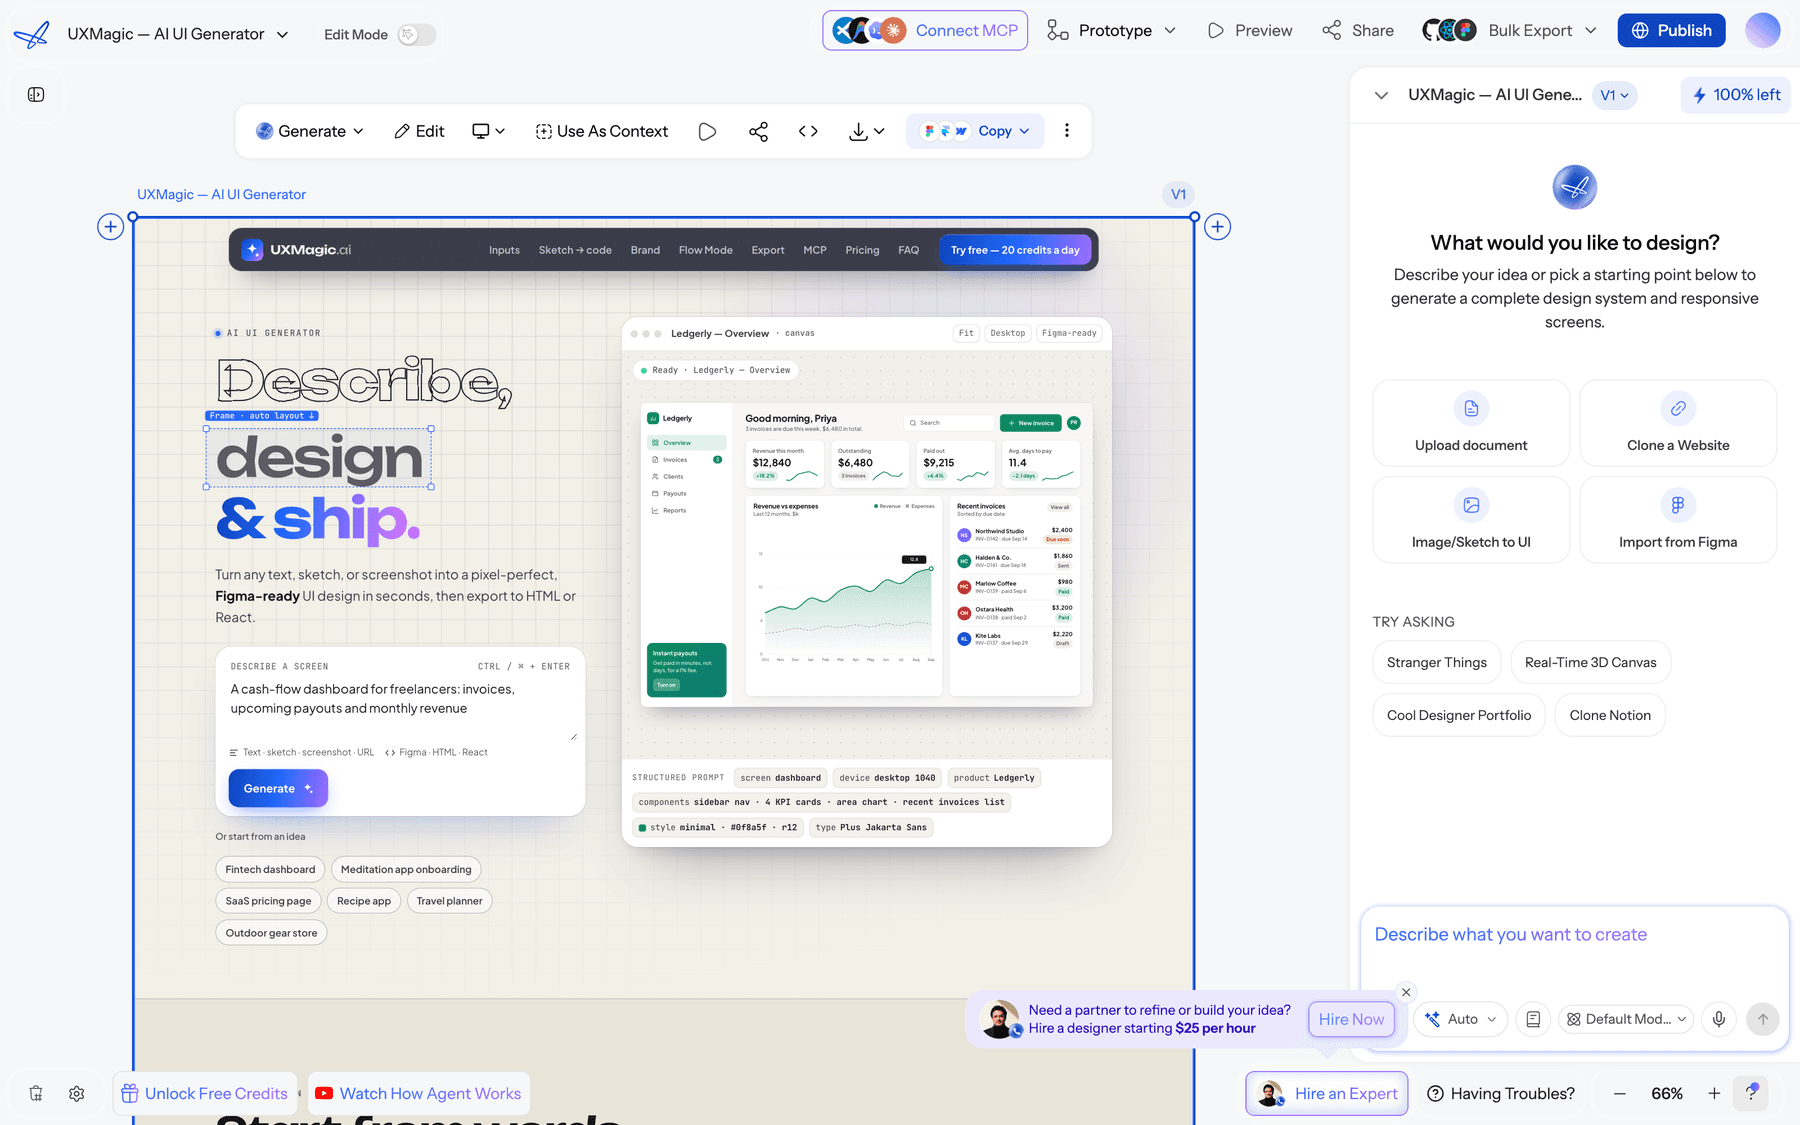
Bring your Nano Banana images in. Upload images through the prompt box or the asset library and reference them in your request ("use the uploaded desk photo as the hero"). The Assets page keeps logos and images you reuse across a project.
Or generate images in place. Ask for an image while you design and UXMagic creates it inside the screen. The same prompt advice applies: describe subject, setting, composition, lighting and mood, and say the aspect ratio ("16:9 hero", "square avatar"). Each generated image costs 0.5 credits, per the credits guide, far less than designing a screen.
Edit an image without touching the rest. In-place editing changes the text in an image, recolours it, restyles it, or adds or removes one element, and leaves everything else pixel-identical. That is also 0.5 credits.
Swap an asset everywhere at once. Ask to replace a logo or product shot "on every screen" and it runs as one operation across the whole project, instead of screen-by-screen edits.
Around the images, the screens are real: flow mode plans and designs a multi-screen journey in one theme, the AI landing page generator builds the page your hero belongs on, and themes and style guides keep colours and type consistent so your images and UI match. If you have a reference screenshot rather than a brief, image to UI rebuilds it as editable design. When you are done, export to Figma, export code with the design to code generator, or publish the site directly.
The honest scope: UXMagic is not a dedicated image studio. If you need 4K print artwork, extreme aspect ratios or fine photographic control, generate that in Nano Banana Pro or 2 and upload it. If an image fails to load after generation, the broken or missing images troubleshooting page covers the usual causes.
Nano Banana 2 Lite, and alternatives
Nano Banana 2 Lite (Gemini 3.1 Flash Lite Image) sits below Nano Banana 2 on both price and capability. It only outputs 1K images and does not support Search grounding, but at about $0.034 per image it suits high-volume jobs such as placeholder imagery, A/B test variants and quick concept boards. Google Cloud's Nano Banana 2 Lite announcement says it can generate an image in as little as four seconds.
If you are still on the original Nano Banana, migrate now. Gemini 2.5 Flash Image shuts down in the API on October 2, 2026, and Google points users to Nano Banana 2 or 2 Lite.
Outside Google, the main alternatives are OpenAI's image models in ChatGPT, Midjourney for stylised art, and Adobe Firefly for teams that need commercially safe training data. We compare them for product work in our roundup of the best AI image generators, and the broader best AI design tools in 2026 ranking covers tools that design screens rather than pictures. Product managers assembling a whole toolkit will find image models in context in our guide to AI tools for product managers.
The bottom line
For product teams, the choice is simpler than the naming suggests. Nano Banana 2 is the everyday model: fast, cheaper, the Gemini app default, and it adds the small sizes and extreme aspect ratios UI work often needs. Nano Banana Pro is the finishing model: use it when one image has to carry a page and the extra cost per image is trivial next to its impact. Draft with 2, finish with Pro, and use 2 Lite for anything you need by the hundred.
Then keep the images in their lane. They are ingredients, not screens. Build the screens in a tool with a real theme and live text, and drop the images in. UXMagic does that, generates and edits images in place for 0.5 credits each, and the Free plan refreshes 20 credits every day; paid plans are on the pricing page. If you want a head start on layout, browse our templates, or read our guide to writing a good prompt before your first project.
Related guides
- GPT Image 2 Review: Features, Pricing and Prompts for UI Assets
- Midjourney Pricing 2026: Plans, GPU Hours, and What Images Really Cost
- Figma Weave Review: Node-Based AI for UI Assets, Not UI Layouts
- Galileo AI Is Now Google Stitch: Here's the 2026 Review
- Google Stitch Pricing 2026: Is It Free, and What Are the Limits?
- Best Figma AI Plugins in 2026: 12 Picks for UI, Assets and Code
- Paper.design Review 2026: HTML Canvas, MCP, Pricing and Limits
- Bolt.new Pricing 2026: Plans, Tokens, and What You Really Pay
- 9 Best Uizard Alternatives in 2026, Grouped by Use Case
- 9 Best UX Pilot Alternatives in 2026, Grouped by Use Case
From generated images to a finished page
Upload your assets or generate them in place, then design, edit and export real screens. Free plan credits refresh daily.